Caulking Is A Finishing Touch That Is Attractive and Functional
Caulking around a bathtub and tile is an essential maintenance task to prevent water damage and mold growth. Here's a step-by-step guide on how to caulk around your bathtub and tile.
Tools and Materials You'll Need:
- Caulk gun
- Caulk (choose a mold-resistant silicone or acrylic latex caulk)
- Caulk removal tool or utility knife
- Painter's tape
- Rubbing alcohol and a clean cloth
- Caulk smoothing tool or a damp finger
- Caulk finishing tool (optional)
- Old rag or paper towels
Step-by-Step Instructions:
1. Remove Old Caulk (if necessary):
- If there's old, cracked, or moldy caulk, remove it using a caulk removal tool or a utility knife. Be careful not to damage the tile or bathtub surface.
2. Clean the Area:
- Use rubbing alcohol and a clean cloth to thoroughly clean the area where you'll be applying caulk. This removes any residues, oils, or soap scum that might prevent proper adhesion.
3. Prepare the Caulk Gun:
- Load the caulk gun with the caulk cartridge. Cut the tip of the caulk cartridge at a 45-degree angle to create an opening that matches the size of the joint you want to caulk.
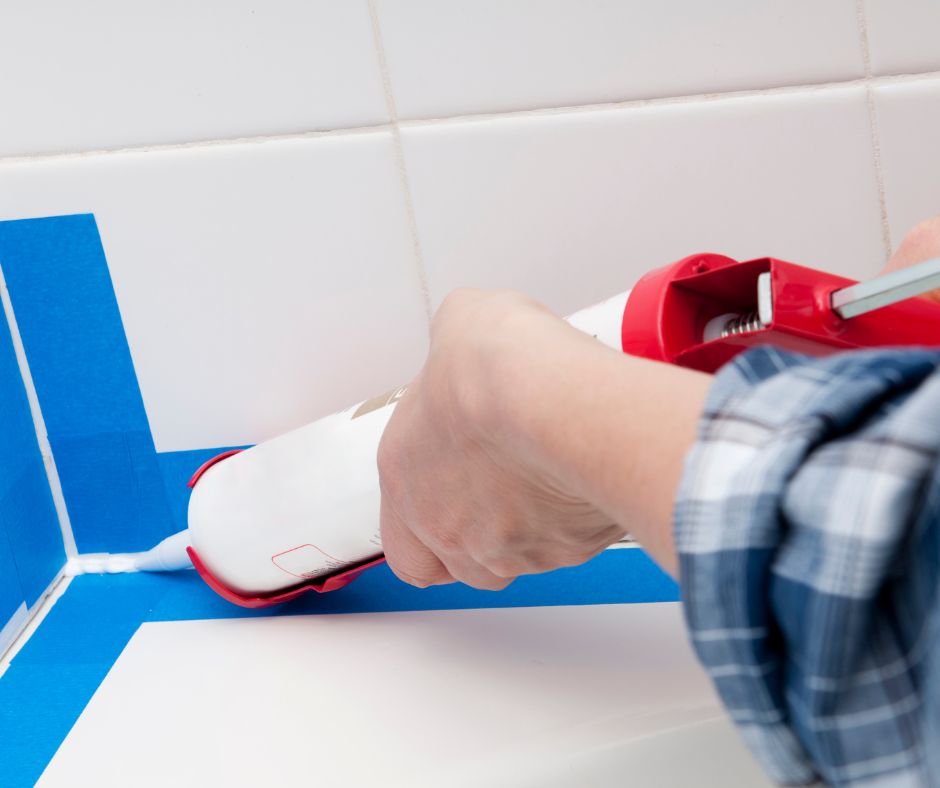
4. Apply Painter's Tape (optional):
- If you want to achieve clean, straight lines, apply painter's tape along the edges of the tile and bathtub, leaving a small gap where you'll apply the caulk. This will help you achieve a neat finish.
5. Start Caulking:
- Hold the caulk gun at a 45-degree angle and apply a steady bead of caulk along the joint between the tile and bathtub. Use even pressure on the caulk gun trigger.
6. Smooth the Caulk:
- Immediately after applying the caulk, use a caulk smoothing tool or a damp finger to smooth the caulk into the joint. You want to create a watertight seal while also making it visually appealing.
7. Remove Excess Caulk:
- Use an old rag or paper towels to wipe away any excess caulk. Be sure to do this while the caulk is still wet for a clean finish.
8. Remove Painter's Tape (if used):
- If you applied painter's tape, carefully remove it while the caulk is still wet. This will leave you with clean lines.
9. Let the Caulk Cure:
- Allow the caulk to cure for the time specified on the caulk manufacturer's instructions. Typically, it takes 24 hours for the caulk to fully set.
10. Check for Gaps:
- After the caulk has cured, inspect the joint to ensure there are no gaps or areas that need touch-up. If necessary, apply additional caulk to any areas that need it.
11. Test for Leaks:
- Run water in the bathtub to check for leaks. Ensure that the caulk is providing a watertight seal.
Caulking around a bathtub and tile is a straightforward task that can help prevent water damage and keep your bathroom looking clean and well-maintained. Properly applied caulk can last for several years, but it's a good idea to inspect and replace it as needed to maintain a watertight seal.
Tips
Caulking can be a useful skill for a variety of home improvement and repair projects. Here are some tips to help you achieve clean and professional caulking results:
1. Choose the Right Caulk:
- Select the appropriate type of caulk for your specific project. Common types include silicone and acrylic latex caulk. Consider factors like moisture resistance, flexibility, and paintability.
2. Prepare the Surface:
- Ensure the surface you're caulking is clean, dry, and free of dust, debris, and old caulk. Use a caulk removal tool or utility knife to remove old caulk if necessary.
3. Use the Right Tools:
- Invest in a good-quality caulk gun for precise control of caulk flow. Have a smoothing tool, damp cloth, and a bucket of soapy water or rubbing alcohol for smoothing and cleanup.
4. Cut the Caulk Tip at the Right Angle:
- Cut the tip of the caulk cartridge at a 45-degree angle. The opening should be just large enough to fill the gap you're caulking.
5. Start Small:
- When in doubt, start with a smaller bead of caulk. You can always add more if needed, but excess caulk can be messy and challenging to remove.
6. Apply Even Pressure:
- Maintain consistent pressure on the caulk gun trigger to ensure a uniform flow of caulk.
7. Work in Sections:
- Divide large areas into smaller sections to ensure even coverage and to avoid the caulk drying before you can smooth it.
8. Smooth the Caulk:
- Use a caulk smoothing tool or a damp finger to smooth the caulk immediately after applying it. Wet your finger with soapy water or rubbing alcohol to prevent sticking.
9. Remove Excess Caulk:
- Wipe away any excess caulk with a damp cloth or sponge before it dries. This helps achieve a clean and professional finish.
10. Use Painter's Tape (if necessary): – Painter's tape can help create straight lines and prevent caulk from spreading to unwanted areas. Remove the tape while the caulk is still wet for clean lines.
11. Allow Adequate Drying Time: – Follow the manufacturer's instructions for drying and curing times. Typically, caulk needs 24 hours to fully set.
12. Inspect Your Work: – After the caulk has dried, inspect the job to ensure there are no gaps, cracks, or areas that need touch-up. Reapply caulk as needed.
13. Practice Makes Perfect: – If you're new to caulking, practice on a scrap piece of material to get a feel for the technique and caulk flow.
14. Keep Caulk Fresh: – Seal the caulk cartridge with a plastic bag and a rubber band to keep it from drying out between uses.
15. Wear Protective Gear: – Depending on the caulk type and the project, wear appropriate safety gear, such as gloves and safety glasses.
Caulking is a valuable skill for maintaining and improving your home. With practice and attention to detail, you can achieve professional-looking results that not only improve the appearance of your home but also help protect it from water damage and drafts.