How To Lay Laminate The Easy Way
Installing laminate flooring is a relatively straightforward DIY project that can dramatically transform the look and feel of a room. Here's a step-by-step guide on how to install laminate flooring:
Tools and Materials You'll Need:
Step By Step Process
Step 1: Prepare the Room
- Remove all furniture, appliances, and any existing flooring.
- Clean the subfloor thoroughly, ensuring it's level, dry, and debris-free.
- Lay down a moisture barrier or underlayment material if required by the manufacturer or for sound insulation.
Step 2: Acclimate the Laminate Flooring
- Allow the laminate planks to acclimate in the room for at least 48 hours before installation.
Step 3: Plan the Layout
- Measure the length and width of the room to determine how many planks you'll need.
- Plan your layout to avoid narrow slivers of flooring at the walls and ensure a balanced appearance.
Step 4: Install the First Row
- Start in a corner of the room.
- Place spacers between the planks and the wall to create an expansion gap (usually around 1/4 inch).
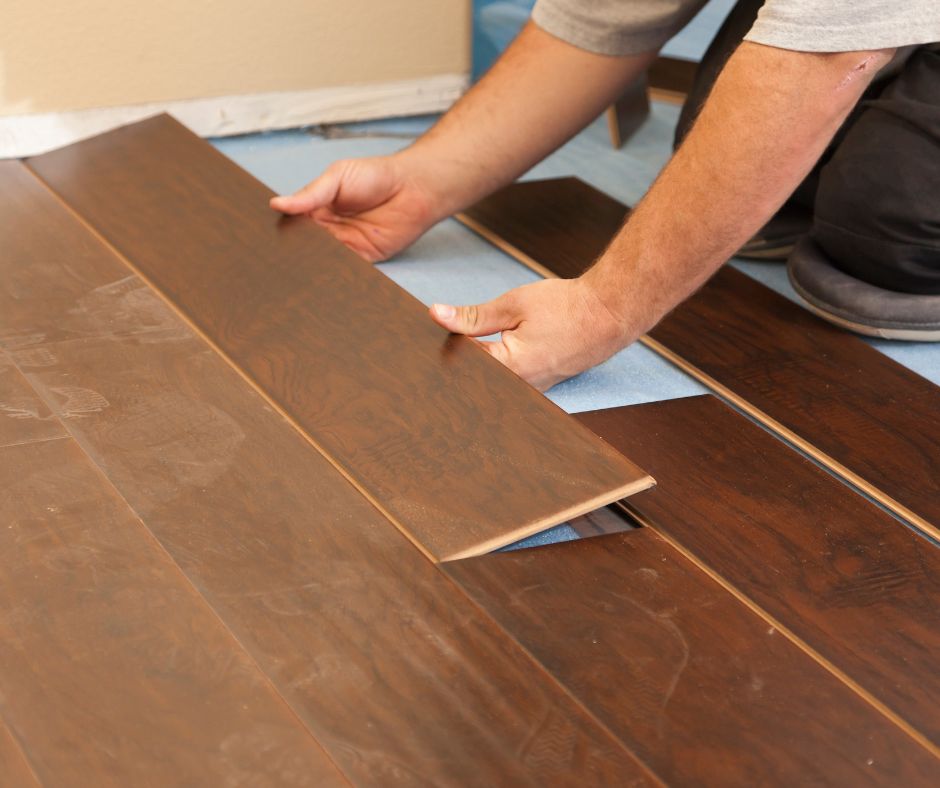
- Install the first row of planks with the tongue side facing the wall, securing them by clicking or snapping them together. Use a tapping block and rubber mallet to ensure a tight fit.
Step 5: Continue Installing Rows
- For the next row, stagger the seams by starting with a cut piece (if necessary) and using the remaining portion from the previous row.
- Maintain the expansion gap by using spacers along the walls.
- As you move along, click or snap each plank into the one before it, ensuring a snug fit.
Step 6: Cut Planks to Fit
- Measure and mark planks for cutting when you reach the end of a row.
- Use a saw (circular or jigsaw) to make precise cuts.
- Always wear safety glasses and a dust mask when cutting laminate flooring.
Step 7: Install Transition Pieces
- Install transitions, such as T-molding or quarter-round, where the laminate meets other flooring types or doorways.
- Secure them in place with nails or screws.
Step 8: Complete the Installation
- Continue laying rows of laminate planks until you reach the final row.
- Measure and cut the last row to fit, ensuring there's an expansion gap along the final wall.
- Remove spacers, and your laminate flooring installation is complete.
Step 9: Install Baseboards
- Reattach or install new baseboards or molding to cover the expansion gap and provide a finished look.
Remember to carefully follow the manufacturer's instructions and recommendations provided with your laminate flooring. With the right tools, preparation, and attention to detail, you can install a professional-looking laminate flooring installation in your home.
Additional Tips For Success
Laying laminate flooring can be a rewarding DIY project, and these tips will help ensure a successful installation:
- Prepare the Subfloor: Ensure the subfloor is clean, dry, level, and free from debris. If it's uneven, use the self-leveling compound to correct imperfections.
- Acclimate the Flooring: Allow the laminate planks to acclimate in the room for at least 48 hours before installation. This helps prevent expansion or contraction after installation.
- Measure and Plan: Measure the room accurately and plan your layout to minimize waste and avoid narrow pieces at the edges. Use a chalk line to mark reference lines.
- Use Underlayment: Install an underlayment material that provides cushioning, sound insulation, and moisture protection. Follow the manufacturer's recommendations for underlayment type.
- Expansion Gaps: Leave an expansion gap around the room's perimeter (usually around 1/4 inch) to accommodate natural expansion and contraction of the flooring. Use spacers to maintain this gap.
- Stagger Seams: Stagger the seams of the laminate planks to create a more stable and attractive appearance. A common rule is to stagger at least 12 inches between end joints.
- Cut Planks Carefully: Measure and mark planks accurately before cutting, and use a fine-toothed saw for clean, precise cuts. Always wear safety glasses and a dust mask when cutting.
- Use the Right Tools: Invest in quality installation tools, such as a tapping block, rubber mallet, pull bar, and spacers. These tools will make the installation process smoother.
- Check for Level: Ensure the first row of planks is level, as it serves as a reference point for the rest of the installation. Use a level to check periodically.
- Follow Manufacturer's Instructions: Always follow the specific installation instructions provided by the laminate flooring manufacturer. This includes details on acclimation, installation direction, and any unique requirements.
- Check for Damage: Inspect each plank for damage or defects before installation. Refrain from installing damaged planks, as they can compromise the integrity of the entire floor.
- Plan for Doorways: When you reach doorways, undercut door frames to allow the laminate to slide underneath. This creates a clean and professional-looking transition.
- Careful Handling: Handle the laminate planks carefully to prevent chipping or damage to the edges, especially with thin or fragile laminates.
- Maintain Consistent Spacing: Ensure consistent spacing along all edges while snapping planks together. Inconsistent spacing can result in visible gaps or uneven edges.
- Clean as You Go: Keep the work area clean to prevent debris from getting trapped under the laminate. Clean any adhesive or glue residues promptly.
- Use Transition Strips: Install transition strips or molding where the laminate meets other types of flooring or doorways. This provides a finished look and hides the expansion gap.
- Follow a Logical Sequence: Work methodically across the room, following a logical sequence to avoid trapping yourself in a corner.
- Quality Over Speed: Take your time to ensure a precise fit and alignment. Rushing can lead to mistakes that are costly to correct.
- Inspect Each Row: After installing each row, inspect it for gaps, visible seams, or any other issues. Correct problems before moving on.
- Protect the Flooring: Once the laminate is installed, cover it with cardboard or protective sheets to prevent damage while completing other work in the room.
By following these tips and taking your time, you can achieve a professional-looking installation of laminate flooring and enjoy the benefits of a beautiful and durable floor in your home.